A sump pump leak around the discharge pipe usually comes from a loose connection, failed seal, cracked fitting, or water backing up through the check valve. Shut off power, dry the area, identify the exact leak point, and repair the connection before the next heavy rain.
A sump pump leaking around the discharge pipe usually has a problem at a connection—not inside the pump motor. Turn off power before handling the pump, dry the area, and watch one complete pump cycle to locate the exact source. Common causes include a loose clamp or threaded fitting, a failed check valve seal, a cracked pipe, or water flowing backward after the pump shuts off.
Shut off power and find the exact leak
If water is near the electrical plug, outlet, or extension connection, do not touch the equipment while standing in water. Switch off the circuit if it is safe to do so, and contact a qualified professional if you cannot safely disconnect the pump.
Once the area is safe:
Dry the pipe, pump outlet, and nearby basin wall with a towel.
Restore power only if the electrical area is dry and it is safe to do so.
Watch the next pumping cycle without touching moving parts.
Note whether water appears while the pump is running, immediately after it stops, or continuously.
A leak that appears only while the pump runs usually points to a pressurized joint, fitting, or crack. A short burst of water after shutdown often indicates backflow through the discharge pipe or a check valve problem.
Check the pump outlet connection first
Most sump pumps connect to a discharge pipe through a threaded adapter, rubber coupling, or clamp. Inspect the connection where the pipe leaves the pump.
If the joint is loose
Disconnect power and support the pipe before tightening anything. A heavy or poorly supported discharge line can pull on the pump outlet and loosen the connection. Tighten clamps evenly, or hand-tighten threaded plastic fittings and then make only a small additional turn if needed.
Do not overtighten plastic fittings. Excess force can crack the pump outlet, adapter, or threaded fitting. Threaded connections generally need a suitable thread sealant installed according to the fitting and pump manufacturer's instructions. Do not use sealant as a substitute for a damaged fitting or missing gasket.
If the rubber coupling is leaking
Inspect the coupling for a distorted edge, split rubber, loose clamps, or a pipe that is not inserted far enough. Replace a damaged coupling rather than trying to seal it with tape or household caulk. The replacement must match the pipe size and connection type.
Product prices and availability are accurate as of the date/time indicated and are subject to change. Any price and availability information displayed on Amazon.com at the time of purchase will apply to the purchase of this product.
Inspect the check valve
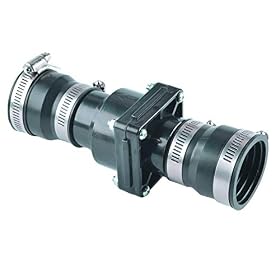
A check valve prevents water in the discharge pipe from flowing back into the sump pit when the pump stops. A leaking or incorrectly installed valve can cause a brief discharge near the connection, repeated pump cycling, or extra strain on the pump.
Check for:
Water escaping from the valve body or its clamps
A cracked valve housing
Loose clamps or threaded connections
An arrow on the valve pointing away from the pump
A valve installed at an angle or in a position not allowed by its instructions
If the valve is leaking from its body or does not close reliably, replace it. Before removing it, support the upper pipe and be prepared for water in the discharge line to drain back into the pit. Follow the valve manufacturer's installation direction and clearance requirements.
A check valve that allows substantial backflow can also make the pump start again shortly after shutting off. This is different from a small amount of water draining back through a properly configured system, but repeated cycling should be corrected because it can shorten pump life.
Product prices and availability are accurate as of the date/time indicated and are subject to change. Any price and availability information displayed on Amazon.com at the time of purchase will apply to the purchase of this product.
Look for a cracked pipe or fitting
Run a dry cloth along the pipe, adapter, valve, and elbows. A hairline crack may only open when the pump creates pressure. Pay special attention to:
The threaded adapter screwed into the pump
Elbows immediately above the pump
The check valve body
Pipe joints that were cut unevenly or forced into alignment
Areas rubbing against the basin, lid, joists, or wall
Replace cracked PVC or other discharge components with compatible parts. Do not rely on epoxy, duct tape, or silicone around a pressurized discharge joint as a permanent repair. If the pump outlet itself is cracked, replacing the pump is usually more reasonable than attempting to repair the housing.
Product prices and availability are accurate as of the date/time indicated and are subject to change. Any price and availability information displayed on Amazon.com at the time of purchase will apply to the purchase of this product.
Check where the pipe passes through the basin lid or wall
If the leak is above the pit rather than at the pump, inspect the point where the discharge pipe passes through the basin cover. A missing or poorly fitted grommet can allow water to escape, especially if the pipe moves when the pump starts.
Make sure the pipe is supported and does not press against the cover opening. A sealed basin cover should use the penetration fittings or grommets specified for that cover. Do not permanently block required air or access openings, and do not modify a sealed cover in a way that prevents safe pump maintenance.
If water is coming from the basin wall rather than the pipe joint, the issue may be a damaged basin, bulkhead fitting, or penetration seal. That repair may require replacing the fitting or basin component rather than tightening the discharge pipe.
Check the discharge setup for movement and pressure
A discharge pipe should be routed so it drains water away from the foundation and does not place sideways force on the pump. Correct problems such as:
A pipe that terminates too close to the foundation
A blocked discharge line can increase pressure at joints and force water out through a weak connection. In freezing weather, inspect the outdoor section for ice and confirm that the discharge route remains open. Never operate the pump against a known blockage unless the manufacturer provides specific instructions for that situation.
If the leak continues after tightening
Disconnect power and remove the failed component if you can do so safely. Replace the gasket, coupling, check valve, adapter, or cracked pipe with a compatible part. Take the old part with you when matching the size and connection style, and follow the sump pump and fitting manufacturer's instructions.
The pump may need replacement when:
The pump's discharge outlet or housing is cracked
The outlet threads are stripped or damaged
The pump leaks from a location that is not a serviceable connection
The pump has been operating against a blockage and now trips, overheats, or fails to move water
The repair would require modifying the pump body
Do not keep operating a pump that sprays water onto an electrical connection or that cannot discharge water reliably. If the pit may fill during a storm, use a safe temporary water-removal plan and arrange prompt repair. A qualified plumber or electrician should handle repairs involving unsafe wiring, a flooded electrical area, or a pump circuit that trips the breaker.
After the repair, verify the system
Run several pump cycles while watching every connection. Confirm that:
No joint drips while the pump runs
No significant water gushes backward when it stops
The check valve points in the correct direction
The discharge route is open
The pipe does not shake excessively or pull on the pump
Water exits well away from the foundation
The pump does not start repeatedly after a short pause
Recheck the repaired area during the next heavy rain. A dry joint during a brief test does not rule out a leak caused by a blocked outdoor line, high flow, or pipe movement.
FAQ
Why is my sump pump leaking where the pipe connects to the pump?
The connection may be loose, incorrectly sealed, under strain from unsupported pipe, or cracked. Turn off power, dry the area, inspect the adapter or coupling, and replace damaged parts instead of overtightening plastic fittings.
Can I use silicone or duct tape to stop a sump pump discharge leak?
These materials are not dependable permanent repairs for a pressurized discharge connection. Replace the failed gasket, coupling, valve, adapter, or pipe with a compatible part and follow the manufacturer's instructions.
Why does water leak after the sump pump shuts off?
Water may be draining back through a failed, incorrectly installed, or leaking check valve. Inspect the valve's direction, body, clamps, and seals. A small amount of normal drain-back may occur in some systems, but repeated pump cycling or a large surge indicates a problem.
Should I replace the sump pump if the discharge outlet is cracked?
Usually, yes. A cracked pump outlet or housing is generally not a reliable repair location. Replace the pump according to the manufacturer's specifications, or have a qualified professional assess it if electrical or flooding hazards are present.