A discharge line that is too small can make a high-GPH sump pump move far less water than expected. Here is how to identify the problem, choose the right pipe size, and decide whether the line or pump needs replacement.
An undersized sump pump discharge line can reduce actual flow even when the pump’s advertised GPH looks adequate. A narrow pipe creates more friction and pressure loss, especially with long horizontal runs, vertical lift, elbows, and restrictive check valves. The pump may run longer, cycle repeatedly, or fail to keep up with incoming water.
Why discharge pipe size affects GPH
A pump’s gallons-per-hour rating is not a universal output figure. Manufacturers usually provide flow at different heights, called head, and sometimes at specific pipe sizes. As the discharge rises and the pipe resists flow, the pump delivers fewer gallons per hour.
A small pipe increases friction loss. The effect becomes more significant when:
The discharge run is long
The pipe rises several feet before exiting
The system has multiple elbows
The check valve has a small internal opening
The line contains corrugated hose, debris, or mineral buildup
The pump is rated for a larger discharge outlet than the installed pipe
For example, reducing a pump’s discharge from 1-1/2 inches to 1-1/4 inches may not stop the pump from running, but it can reduce delivered flow. The exact loss depends on the pump curve, pipe material, total length, vertical lift, fittings, and check valve.
The most useful comparison is not the pump’s maximum GPH. Compare the pump’s rated flow at your system’s total dynamic head with the amount of water entering the pit. Total dynamic head includes vertical lift plus friction from the pipe, fittings, and valve.
Signs the discharge line is too small
An undersized line is more likely when the pump operates normally but removes water slowly. Common symptoms include:
The pump runs for a long time during heavy rain
Water level rises unusually high before the float shuts the pump off
The pump cycles frequently because it drains the pit slowly
The pump moves noticeably less water than the stated rating
The motor or housing becomes excessively hot
The discharge is weak even though the inlet and filter are clear
A larger pump was installed without upgrading the discharge plumbing
These symptoms can also come from a clogged pipe, a bad check valve, a leaking joint, an incorrect float setup, or excessive lift. Do not assume pipe diameter is the only cause.
Product prices and availability are accurate as of the date/time indicated and are subject to change. Any price and availability information displayed on Amazon.com at the time of purchase will apply to the purchase of this product.
Check the system in a sensible order
1. Confirm the pump’s required discharge size
Read the pump manual or manufacturer label. Check the recommended discharge diameter and the flow chart, if one is provided. Some pumps can use a smaller adapter, but that does not mean the smaller line will deliver the pump’s full rated capacity.
Do not judge the system by the outlet fitting alone. A pump with a 1-1/2-inch outlet connected to a long 1-1/4-inch line is still operating through the smaller line.
2. Inspect the filter or pump inlet
Disconnect power before handling the pump. Remove debris from the intake screen or inlet area according to the manufacturer’s instructions. Mud, gravel, lint, and plastic debris can restrict inflow and imitate a discharge problem.
If the pump has a removable strainer or filter, clean or replace it only with the specified part. Never operate a pump without a required screen or guard.
3. Check the hose or discharge pipe for blockage
Inspect the entire accessible discharge route. Look for:
Crushed or sharply bent flexible hose
Ice at the exterior outlet
Dirt, sediment, or plant roots in the termination
A sag that holds water and restricts flow
A pipe that has separated or collapsed
If safe to do so, disconnect the discharge from the pump and inspect for obstructions. Keep water away from electrical connections, and follow the pump manual before removing any plumbing.
4. Inspect connections and seals
A leak on the pressure side can reduce the amount of water reaching the exterior. Look for spraying, damp joints, cracked adapters, loose clamps, or a check valve that is leaking around its connections.
A small air leak is not usually the same as a suction problem because most sump pumps push water rather than pull it. However, a split or loose discharge connection can still waste flow and cause water to return to the pit.
5. Check the check valve
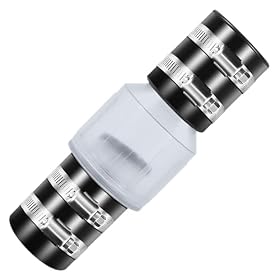
The check valve should allow water to leave the pit and prevent it from flowing back after the pump shuts off. A valve that is installed backward, stuck partly closed, or too restrictive can significantly reduce flow.
Confirm the arrow points away from the pump. Listen for abnormal rattling, and inspect the valve for debris if the manufacturer allows it. Replace a valve that does not open freely or seal reliably. Use a valve with an internal passage appropriate for the discharge size rather than relying only on the outside connection diameter.
6. Verify the pipe route and pump setup
Measure the approximate vertical distance from the pump outlet to the discharge point and account for long horizontal sections. Count sharp elbows and transitions. A pump can meet its advertised flow at low head but perform poorly at a higher installed head.
Also confirm that:
The pump is sitting upright and stable
The float can move freely
The float is not trapped against the basin or plumbing
The discharge is not routed through an unnecessary restriction
The exterior outlet is not blocked or frozen
The pipe does not terminate below a level where water can flow back toward the foundation
7. Check whether the basin or pump is overloaded
A full basin does not necessarily mean the pipe is too small. It may indicate that inflow exceeds the pump’s real output at the installed head. During a storm, observe whether the water level continues rising, stabilizes, or falls slowly.
If the pump cannot keep the water below the desired level, do not leave the system unattended. Use a safe temporary water-removal method if appropriate, and address the capacity problem before the next storm.
Product prices and availability are accurate as of the date/time indicated and are subject to change. Any price and availability information displayed on Amazon.com at the time of purchase will apply to the purchase of this product.
How to correct an undersized discharge line
The usual correction is to replace the restrictive section with pipe at the diameter recommended by the pump manufacturer. Ideally, the larger diameter continues through the long run instead of immediately reducing after the pump outlet.
When replacing the line:
Match the pipe size to the pump’s installation instructions.
Keep the route as short and straight as practical.
Use sweeping bends where the system permits them.
Limit unnecessary adapters and sharp elbows.
Choose a check valve designed for the pipe size and flow direction.
Support the pipe so its weight does not pull on the pump outlet.
Maintain a discharge route that drains away from the foundation.
Protect the exterior outlet from freezing and blockage.
A larger pipe will not always solve the problem. If the vertical lift is beyond the pump’s capability, the pump may still have insufficient output. In that case, select a pump based on its flow at the required head, not its maximum or zero-head GPH rating.
Product prices and availability are accurate as of the date/time indicated and are subject to change. Any price and availability information displayed on Amazon.com at the time of purchase will apply to the purchase of this product.
When replacing the pump makes more sense
Replace or resize the pump when the discharge line meets the manufacturer’s requirements but the pump still cannot keep up with normal inflow. A pump may also be near the end of its service life if it has a noisy motor, overheats, trips electrical protection, or produces much less flow after the plumbing is cleared.
Do not install a much larger pump on an existing undersized line without evaluating the entire system. The larger pump may run against greater friction, cycle differently, or provide little practical improvement until the discharge plumbing is upgraded.
For a frequently flooded basement, a properly sized primary pump, a separate backup system, and a high-water alarm may be more appropriate than simply installing the highest-GPH pump available. Electrical connections and backup systems should follow manufacturer instructions and applicable local requirements; have a qualified professional inspect the installation if wiring, grounding, or an unsafe wet-area connection is involved.
FAQ
Can a 1-1/4-inch discharge pipe be used with a sump pump?
It can be used only when the pump manufacturer permits it, but it may reduce flow compared with a larger recommended line. The effect is greater with long runs, vertical lift, elbows, and restrictive check valves.
Does a bigger discharge pipe make a sump pump stronger?
A larger pipe does not increase the pump’s rated power, but it can reduce friction loss and allow the pump to deliver more of its available flow. The pump still must be sized for the system’s total vertical lift.
How do I know whether the check valve or pipe is restricting flow?
Check that the valve arrow points away from the pump, inspect for debris or a stuck flap, and look for crushed hose, blockage, or leaks along the discharge route. Replace a damaged or overly restrictive valve with a properly sized model.
Should I replace the pump or the discharge line first?
If the pump runs normally but the plumbing is smaller than the manufacturer’s recommendation, clear or upgrade the discharge line first. If the line is correctly sized and unobstructed but the pump cannot keep up at the installed head, evaluate the pump’s flow curve and consider replacement.