A sump pump kit with a basin can simplify a new pit installation, but the parts still need to match your pit depth, inflow, discharge route, and backup needs. Here is how to choose the right kit and avoid common setup problems.
What do you need help with?
Open an answer, or tell us what we should cover next.
Answered in this guide
Choose the basin first for a new-pit sump pump kit
Start with a basin that fits the pit and provides enough water capacity for the expected inflow. A suitable basin gives the pump useful run cycles and helps prevent rapid cycling caused by an undersized pit.
Prevent discharge water from flowing back into the pit
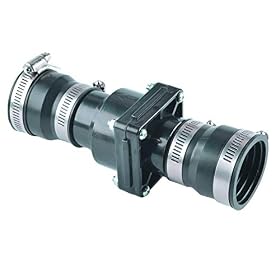
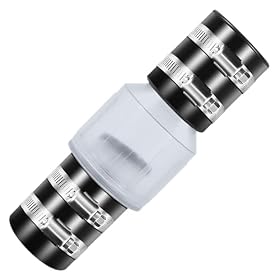
Use a check valve to stop water in the discharge pipe from returning to the basin after shutdown. This reduces repeated lifting of the same water column and can limit unnecessary pump cycling.
Know when a standard single-pump kit is not enough
A standard kit may not suit heavy groundwater, frequent outages, finished living areas, or a history of flooding. Those conditions may call for a primary-and-backup setup or another higher-capacity arrangement.
Requests help us prioritize the next guide. No email required.
One anonymous request per topic.
A sump pump kit with basin for a new pit can provide the main components for a basement drainage system in one purchase: the pump, collection basin, lid, float or sensor, and sometimes a check valve or discharge fittings. Before buying, confirm that the basin fits the space, the pump can handle the required lift, and the kit includes—or is compatible with—the discharge parts your installation needs.
What a sump pump kit usually includes
Kit contents vary, so check the product description and installation manual rather than assuming every part is included. A kit may contain:
Short sections of discharge pipe or flexible connector
Fasteners or sealing hardware
Some kits include only the pump and basin. Others are packaged with enough fittings to connect the pump to a nearby discharge line. You may still need rigid pipe, elbows, a full-port check valve, a union, an exterior discharge fitting, or a backup pump.
Choose the basin before choosing the pump
The basin must fit the new pit and provide enough water capacity for the expected inflow. A larger basin generally gives the pump more room to run through a useful cycle, while a small basin may cause frequent starts if groundwater enters quickly.
Check these dimensions before ordering:
Inside diameter: The pump must fit without rubbing against the basin walls or float mechanism.
Basin depth: The pump and float need enough vertical clearance to operate correctly.
Overall height: Account for the lid, discharge pipe, and available floor or crawl-space clearance.
Inlet locations: Some basins have molded openings for drain tile or perforated pipe; others require field-cut openings.
Lid openings: The lid should accommodate the discharge pipe and electrical cord while limiting vapor, moisture, and debris entry.
Do not select a basin solely because its advertised capacity sounds large. The usable volume depends on the water level at which the pump starts and stops, the pump design, and the float's range of movement.
Product prices and availability are accurate as of the date/time indicated and are subject to change. Any price and availability information displayed on Amazon.com at the time of purchase will apply to the purchase of this product.
Match pump capacity to the discharge route
Pump capacity is affected by head height, pipe size, pipe length, elbows, check valves, and the discharge outlet. A pump's maximum gallons-per-hour or gallons-per-minute figure is normally measured with little or no lift, so it does not represent flow in an installed system.
Estimate the pump's required lift by measuring from the pump outlet to the highest point the water must reach. Then add the friction caused by horizontal pipe runs, elbows, reducers, and valves. Compare that total with the pump's performance chart, not just its maximum-flow number.
For a new pit, consider:
The vertical distance to the discharge point
The pipe diameter recommended by the pump manufacturer
The length and number of elbows in the line
Whether water must travel uphill outside the foundation
The amount of groundwater entering the pit during heavy rain
Whether local plumbing or building rules specify a discharge arrangement
A pump with a higher advertised flow rate is not automatically the right choice. An oversized pump may cycle more often in a small basin, while an undersized pump may struggle to keep up during severe storms.
Product prices and availability are accurate as of the date/time indicated and are subject to change. Any price and availability information displayed on Amazon.com at the time of purchase will apply to the purchase of this product.
Check the float or water-level sensor
The switch must move freely inside the basin. If it contacts the pump, basin wall, discharge pipe, or power cord, it may fail to start or stop the pump reliably.
Common switch types include:
Vertical float switches: Compact and useful in narrower basins, but they need unobstructed vertical movement.
Tethered float switches: Offer a longer operating range, but they need a wider basin and clearance around the float.
Electronic sensors: Avoid some mechanical movement issues, but they depend on the manufacturer's installation requirements and may be more sensitive to residue or water conditions.
Before closing the lid, pour water into the basin and verify that the pump starts at an appropriate level and shuts off without leaving excessive water behind. Disconnect power before making adjustments or reaching into the basin.
Product prices and availability are accurate as of the date/time indicated and are subject to change. Any price and availability information displayed on Amazon.com at the time of purchase will apply to the purchase of this product.
Do not overlook the check valve
A check valve prevents water in the discharge pipe from flowing back into the basin after the pump stops. Without one, the pump may need to lift the same column of water repeatedly, increasing cycling and reducing effectiveness.
Install the valve in the direction marked by its flow arrow. Make sure it is accessible for inspection or replacement. If the kit includes a valve, confirm that it matches the discharge pipe size and connection type. A valve that leaks, sticks, or is installed backward can cause poor performance even when the pump itself is working.
Avoid using a valve or fitting that reduces the discharge opening below the pump manufacturer's recommendation unless the installation instructions specifically allow it.
Product prices and availability are accurate as of the date/time indicated and are subject to change. Any price and availability information displayed on Amazon.com at the time of purchase will apply to the purchase of this product.
Plan the discharge before setting the basin
The discharge route is one of the most important parts of a new sump installation. It should carry water away from the foundation and should not simply empty beside the basin or exterior wall.
Plan for:
A secure connection from the pump to rigid discharge pipe
A route that avoids unnecessary bends
Protection from freezing where the pipe exits the building
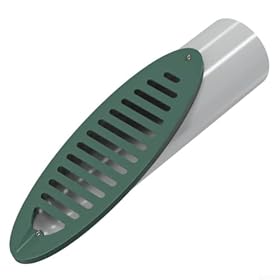
An exterior outlet that directs water away from the foundation
Compliance with local requirements for stormwater or drainage discharge
A way to disconnect or service the pump later
Do not bury a discharge line without considering freezing, blockage, and access for maintenance. In cold climates, an improperly arranged exterior section can freeze and force water back toward the foundation.
Installation considerations for a new pit
A new pit may require more than placing a basin in the floor. Before cutting concrete or excavating, confirm the planned location will intercept water and will not damage structural footings, utilities, radiant-floor tubing, or buried plumbing.
A typical installation involves:
Marking the basin location and checking for utilities or structural conflicts.
Excavating to the basin manufacturer's required depth and clearance.
Creating a stable, level base of suitable aggregate or bedding material.
Setting the basin level and connecting any perimeter drain tile or inlet pipe.
Backfilling around the basin as directed so it does not shift.
Installing the pump, check valve, discharge pipe, and lid.
Connecting power to a properly grounded outlet with the protection specified by the manufacturer and local code.
Testing the pump with clean water before relying on it during a storm.
Concrete cutting, electrical work, and connections to foundation drainage can involve significant safety and code issues. Follow the pump and basin instructions, obtain required permits, and use qualified professionals when the work involves structural concrete, new wiring, sewage, or uncertain buried utilities.
Is a complete kit better than buying parts separately?
A kit is often convenient when the basin and pump are designed to work together and the included switch, lid, and fittings match. It can also reduce the chance of buying an incompatible basin opening or pump mount.
Buying parts separately may be better when you need to:
Fit an unusually narrow or deep pit
Handle a high water inflow
Use a specific pump performance range
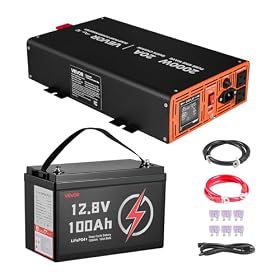
Add a battery or water-powered backup system
Run a longer or larger discharge line
Replace only one failed component
Compare the complete bill of materials. A low-cost kit may still require a check valve, discharge pipe, exterior fitting, alarm, backup system, or electrical upgrades before it is ready for service.
New-pit setup checklist
Before purchasing, confirm:
The basin's outside dimensions fit the planned opening.
The pump fits inside with unrestricted float movement.
The basin depth works with the pump's intake and switch range.
The pump's performance chart covers the total lift and pipe layout.
The discharge pipe size matches the pump instructions.
A check valve is included or added separately.
The lid has suitable openings for the pipe and cord.
The power source is grounded and protected as required.
The discharge outlet will not send water back toward the foundation.
The installation allows future pump removal and cleaning.
A backup plan is in place if flooding or power loss is a serious risk.
When to choose a different setup
A standard single-pump kit may not be sufficient for a basement with heavy groundwater, frequent outages, a finished living area, or a history of flooding. In those cases, consider a primary and backup pump arrangement, a battery backup, a high-water alarm, or a larger commercial-style system based on the actual site conditions.
If the pit is already installed but the pump cannot keep up, first verify the discharge line, check valve, switch operation, and actual lift. If the pump is noisy, overheats, trips protection, or has a damaged cord, stop using it and follow the manufacturer's service guidance. A replacement pump is usually more reasonable than repair when the motor is sealed, the unit has suffered water or electrical damage, or compatible replacement parts are unavailable.
FAQ
Does a sump pump kit include everything needed for installation?
Not always. Many kits include a pump and basin, but discharge pipe, check valves, elbows, exterior fittings, electrical work, and backup equipment may be separate purchases. Confirm the exact contents before ordering.
What size basin should I use for a new sump pit?
Use a basin that fits the available opening and allows the pump and float to move freely. The appropriate size also depends on groundwater inflow, pump cycling, pit depth, and the manufacturer's installation requirements.
Does a sump pump kit need a check valve?
A check valve is normally used to keep water in the discharge pipe from flowing back into the basin after the pump stops. Install a compatible valve in the correct flow direction and where it can be serviced.
Can I install a new sump basin myself?
Some installations are suitable for experienced DIY work, but cutting concrete, excavating near footings, connecting drainage, and modifying electrical wiring can create structural, code, and safety risks. Follow local requirements and use qualified help when those conditions apply.
When should I add a backup sump pump?
Consider a backup when the basement is vulnerable to flooding during power outages, the primary pump is difficult to access, groundwater inflow is high, or stored belongings and finished spaces would be costly to damage.