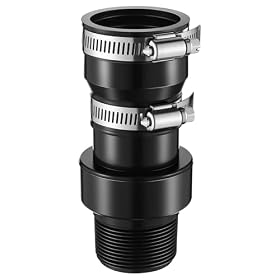
A rattling sump pump check valve is usually caused by the valve flap closing rapidly, a loose discharge pipe, debris, or an incorrectly installed valve. Use these checks to identify the noise and fix it safely.
A sump pump check valve usually rattles because its internal flap is moving rapidly, the discharge pipe is vibrating, or debris is preventing the valve from closing smoothly. Unplug the pump before inspecting the piping, then check the valve, pipe supports, pump cycling, and installation direction in that order. A brief click when the pump stops can be normal; loud, repeated rattling is worth correcting because it can loosen fittings and reduce reliable drainage.
What the rattling sound means
A check valve allows water to flow out of the sump pit but prevents water in the discharge pipe from flowing back into the pit. When the pump stops, the valve closes. Rattling can occur when:
The valve flap repeatedly opens and closes as water flow changes.
Water flowing backward slams the flap shut, creating water hammer.
The discharge pipe is loose and vibrates against the basin, joists, or wall.
Dirt, gravel, or other debris is caught in the valve.
The valve is installed backward or is a poor match for the pump and pipe arrangement.
The pump is cycling rapidly because water is returning to the pit or the float is set incorrectly.
A single soft click at shutdown is generally less concerning than a loud buzz, repeated chatter, or banging that continues while the pump runs.
Check the valve and pipe safely
1. Disconnect power first
Unplug the sump pump before touching the check valve, discharge pipe, or pit. Keep electrical connections and the pump plug away from standing water. If the pump is hardwired, turn off the appropriate circuit and have electrical work performed by a qualified professional when necessary.
If heavy rain is occurring and the pit is filling quickly, do not leave the pump disconnected without a plan. Use the manufacturer's emergency guidance or have a qualified person help maintain drainage while the pump is inspected.
2. Look for a loose or vibrating discharge pipe
With the pump running only when it is safe to observe from a dry position, watch and listen to the discharge pipe. A pipe that taps against the basin, floor framing, or nearby wall can sound like a defective check valve.
Secure the pipe with appropriate supports, but do not crush or distort it. Avoid rigidly forcing the pipe into a position that puts sideways stress on the pump outlet. Replace damaged hangers or fittings, and leave enough flexibility to avoid transferring vibration into the basin or building structure.
3. Inspect the check valve for debris
After disconnecting power and controlling water flow, inspect the valve according to its manufacturer's instructions. If the valve can be opened, look for sediment, small stones, plastic fragments, or other debris around the flap or sealing surface.
Clean only in a way the manufacturer permits. Do not pry against a plastic flap or force the valve open with a tool. A flap that is cracked, warped, loose on its hinge, or unable to seal should generally be replaced rather than repaired.
4. Confirm the valve's direction
Most check valves have an arrow showing the direction of water flow. The arrow should point away from the sump pump and toward the discharge outlet. A reversed valve can restrict flow, cause unusual pump behavior, and produce noise.
Also check that the valve is installed in the position specified by its instructions. Some designs are intended for a particular orientation. An improperly positioned valve may not close consistently or may allow the internal mechanism to chatter.
5. Check for water hammer and backflow
When the pump stops, water in a long vertical discharge run falls backward until the valve closes. The resulting pressure change can create a sharp bang or repeated rattling. This is often called water hammer.
Check for these clues:
The noise occurs mainly when the pump shuts off.
The pipe jumps or shakes at shutdown.
The pit receives a noticeable surge of returning water.
The pump starts again soon after stopping.
A properly selected replacement check valve may reduce the noise, but the pipe layout also matters. Keep the discharge route as direct as practical, support the piping, and follow the pump and valve manufacturer's installation requirements. Do not add restrictive fittings or reduce pipe size simply to make the system quieter.
6. Check whether the pump is short-cycling
A pump that starts and stops repeatedly can make the valve chatter even when the valve itself is not broken. Possible causes include:
Water flowing back through a leaking valve.
A float switch that is obstructed or adjusted incorrectly.
A discharge outlet that is blocked or frozen.
A pump that is too large or too small for the system.
A basin or pump arrangement that does not provide enough operating volume.
Make sure the float moves freely and does not contact the basin, pump, or discharge pipe. Check the outdoor discharge point for ice, soil, leaves, or other blockage. Do not modify float settings unless the pump's instructions allow it.
Product prices and availability are accurate as of the date/time indicated and are subject to change. Any price and availability information displayed on Amazon.com at the time of purchase will apply to the purchase of this product.
When to replace the check valve
Replacement is reasonable when the valve continues to rattle after the pipe is secured and the system is free of debris, or when the valve leaks water back into the pit. It is also a good candidate for replacement if the flap, hinge, body, gasket, or threaded connection is damaged.
Choose a valve that matches the pump system's pipe size, connection type, flow direction, and installation requirements. A valve that physically fits may still be unsuitable if it restricts flow or is not designed for the installation orientation. Follow the pump manufacturer's recommendations rather than choosing solely by appearance.
Before removing the existing valve, have a way to control water in the discharge pipe. Water may drain back when the connection is opened. After installation, confirm that:
The flow arrow points away from the pump.
Connections are tight but not overtightened.
The pipe is supported without stressing the pump outlet.
The pump can discharge without unusual vibration.
The valve closes without sustained rattling when the pump stops.
Product prices and availability are accurate as of the date/time indicated and are subject to change. Any price and availability information displayed on Amazon.com at the time of purchase will apply to the purchase of this product.
When the pump may be the problem
The check valve is not always the source of the noise. Consider inspecting or replacing the pump when it has reduced output, overheats, trips a breaker, makes grinding sounds at the motor, or cannot keep up with normal inflow. A failing pump can create unstable flow that makes a sound check valve chatter.
Do not open a sealed motor housing or bypass electrical protection. If the pump trips a breaker, shows damaged wiring, smells overheated, or operates erratically, disconnect it when safe and contact a qualified electrician or pump professional. If the pit is filling and there is a risk of flooding, arrange a temporary backup pump or other emergency drainage solution.
Product prices and availability are accurate as of the date/time indicated and are subject to change. Any price and availability information displayed on Amazon.com at the time of purchase will apply to the purchase of this product.
The practical fix
Start with the simplest causes: secure the discharge pipe, remove permitted debris, verify the flow arrow and installation position, and check for rapid cycling or backflow. If the valve still rattles or leaks, replace it with a compatible check valve. If the pump has electrical, motor, or capacity symptoms as well, replacing only the valve may not solve the problem.
Product prices and availability are accurate as of the date/time indicated and are subject to change. Any price and availability information displayed on Amazon.com at the time of purchase will apply to the purchase of this product.
FAQ
Is a rattling sump pump check valve normal?
A brief click when the pump stops can be normal. Loud rattling, repeated chatter, pipe banging, or noise that occurs throughout the pumping cycle usually indicates pipe vibration, debris, water hammer, rapid cycling, or a worn valve.
How do I stop my sump pump check valve from rattling?
Unplug the pump, inspect the valve for permitted cleaning, secure the discharge pipe, verify the flow direction, and check for water returning to the pit or rapid float cycling. Replace the valve if its flap or hinge is damaged or it continues to leak and rattle.
Can a bad check valve damage a sump pump?
A leaking or unstable check valve can allow water to flow back into the pit, causing the pump to run more often. Repeated cycling can increase wear and reduce the system's ability to handle heavy inflow.
Should a sump pump check valve be vertical or horizontal?
The correct orientation depends on the valve design and manufacturer instructions. Follow the flow arrow and installation requirements rather than assuming every valve works in the same position.