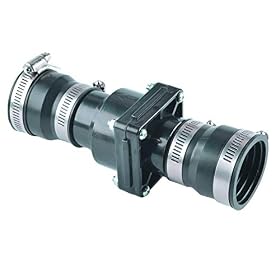
Buying a Union Fitting So the Next Pump Swap Is Easier
A union fitting lets you disconnect a sump pump without cutting the discharge pipe. Here is how to choose the right size and install it alongside the check valve.
Buying a union fitting so the next pump swap is easier
A union fitting is one of the simplest ways to make a future sump pump replacement faster. Installed in the discharge pipe, it allows you to separate the pump from the fixed plumbing without cutting pipe or removing a long section of the discharge line. Choose the union to match your pipe size and material, and place it where it remains accessible above the pump.
What a sump pump union fitting does
A union has two threaded ends and a removable center nut. Once the nut is loosened, the plumbing separates at the union while the connected pipe remains in place.
Without a union, a pump swap may require cutting PVC, unscrewing threaded fittings, or lifting a larger section of discharge pipe out of the basin. A union is especially useful when:
The pump is connected to rigid PVC or ABS pipe
The discharge pipe is difficult to flex or remove
The pump sits in a tight basin
You expect to inspect or replace the pump periodically
A check valve is installed in the same discharge assembly
A union does not replace a check valve. The check valve limits water flowing back into the basin when the pump shuts off; the union simply provides a serviceable connection.
Choose the union by pipe size and material
Match the nominal pipe size
The union’s connection size must match the nominal size of the discharge pipe and the pump outlet arrangement. Common sump discharge setups use rigid plastic pipe, but the correct size depends on the existing installation and the pump manufacturer’s instructions.
Do not measure only the outside diameter and assume that measurement is the nominal pipe size. If the marking is not visible, identify the pipe material and compare the fitting connection with the pump outlet or an existing fitting. When in doubt, take a clean section of pipe or the old fitting to a plumbing-supply store.
Match the connection type
Unions are available with different connection styles, including:
Socket or slip connections: The pipe is cemented into the fitting. Use cement and primer approved for the pipe material and follow the product instructions.
Female or male threaded connections: These screw onto a threaded adapter, pump outlet, or other fitting. Avoid forcing mismatched threads together.
Combination unions: One side may be threaded while the other side is designed for solvent-welded pipe.
PVC and ABS are not interchangeable simply because they look similar. Use fittings, primer, cement, and pipe that are compatible with the material in your discharge line. If the pump outlet is threaded plastic, tighten fittings carefully; excessive force can crack the outlet.
Check the pump manufacturer’s requirements
The union should not reduce the discharge connection below the size recommended for the pump. Also confirm that the fitting is suitable for the discharge application and compatible with the pump’s outlet and pipe material. Keep the manufacturer’s installation instructions available during the work.
Product prices and availability are accurate as of the date/time indicated and are subject to change. Any price and availability information displayed on Amazon.com at the time of purchase will apply to the purchase of this product.
Where to install the union
Install the union in an accessible, vertical or horizontal section of discharge pipe above the sump basin. It should be close enough to the pump that disconnecting the pump is convenient, but not so close that the union is hidden below the lid or pressed against the basin wall.
If the system has a check valve, the usual service-friendly arrangement is:
Sump pump outlet
Short discharge pipe section
Check valve, if required by the pump installation
Union in an accessible location
Remaining discharge pipe leading outside
The exact order can vary by the pump and plumbing layout. Follow the check valve’s flow arrow and leave enough room to loosen the union nut. Do not bury the union behind a sealed cover or permanently fixed framing.
A union is not a substitute for proper pipe support. Secure the discharge pipe as needed so its weight is not carried by the pump outlet or the union.
Product prices and availability are accurate as of the date/time indicated and are subject to change. Any price and availability information displayed on Amazon.com at the time of purchase will apply to the purchase of this product.
How to install a union for easier pump replacement
Before cutting or disconnecting anything, unplug the pump and any backup pump. If water could enter the basin while the pump is off, take steps to manage that risk. Do not work on energized equipment or wet electrical connections.
Confirm the layout and parts. Dry-fit the union, pipe, adapters, and check valve. Make sure the union can be opened after installation.
Mark the pipe. Choose a straight section with enough room for the union body and its removable nut.
Cut and deburr the pipe. Remove burrs and wipe away debris so the connections seat properly.
Dry-fit everything again. Check alignment before applying cement or thread sealant.
Make the permanent connections. Use the correct cement for the pipe material. For threaded plastic connections, use the sealant recommended for the fitting and avoid overtightening.
Allow solvent-welded joints to cure. The cement manufacturer’s instructions determine the required cure time, which can depend on pipe size, temperature, and humidity.
Tighten the union by hand. The sealing surfaces inside the union do the work; excessive wrench force can damage the fitting.
Test the system. Restore power only after the plumbing and electrical connections are dry and secure. Add water to the basin as appropriate, verify that the pump starts, and inspect every joint for leaks.
Product prices and availability are accurate as of the date/time indicated and are subject to change. Any price and availability information displayed on Amazon.com at the time of purchase will apply to the purchase of this product.
Common mistakes to avoid
Installing the union backward or misaligned
Many unions function in either direction, but the pipe must be aligned so the center nut can be loosened and the sealing faces remain square. A stressed fitting can leak or make future separation difficult.
Hiding the union under the basin lid
A union that cannot be reached does not provide much service benefit. Keep it visible and accessible.
Using the wrong pipe cement
A cement intended for one plastic material may not properly bond another. Confirm compatibility on the cement and fitting labels.
Omitting the check valve
The union does not stop reverse flow. If the pump system requires a check valve, install one with the flow arrow pointing away from the pump.
Relying on the union to support the pipe
Support long discharge runs independently. Movement and pipe weight can damage the pump outlet or create a leak at the union.
When a union is not enough
If the existing discharge pipe is cracked, badly glued, undersized for the pump, or routed in a way that causes repeated clogs or freezing, replacing only the union may not solve the problem. A new pump may also require a different outlet adapter or discharge arrangement.
Replace the union if its sealing faces are damaged, the center nut is cracked, or it still leaks after the pipe is properly aligned and the nut is hand-tight. If the pump outlet, electrical cord, or basin wiring is damaged, stop and follow the manufacturer’s instructions or have a qualified professional handle the repair.
FAQ
Does a sump pump need a union fitting?
No. A union is optional, but it makes pump removal easier by allowing the discharge pipe to separate without cutting it. It is most useful with rigid pipe and tight installations.
Should the union go before or after the check valve?
Either layout may work if it follows the pump and check valve manufacturers’ instructions, but the union should be accessible and the check valve’s flow arrow must point away from the pump. Leave enough room to service both fittings.
Can I use a PVC union on an ABS sump pump discharge pipe?
Do not assume they are interchangeable. Match the union, pipe, primer, and cement to the pipe material and fitting instructions. Use a compatible transition fitting when joining different materials.
Can I install a union directly on the sump pump outlet?
Sometimes, but it depends on the pump’s outlet, the union’s connection type, and the available space. A short pipe section or adapter may be needed to avoid stressing the pump outlet and to leave room for service.